Enabling fake-kms on Raspberry Pi
Last Update: 2024-03-13
The following guide or recipe requires shell access to your FydeOS installation, therefore developer mode is assumed to be enabled. If altering system file is required, you will also need to disable root file system verification.
This guide is specifically designed for Raspberry Pi devices running on the following operating systems:
- FydeOS for SBC - Raspberry Pi 5/400/4B
- openFyde for Raspberry Pi 4B
- Chromium OS for Raspberry Pi
Our objective is to enable fake-kms by modifying the config.txt configuration file. We present two distinct methods for this task. Choose the one that suits your needs best.
Method 1: System Configuration Modification
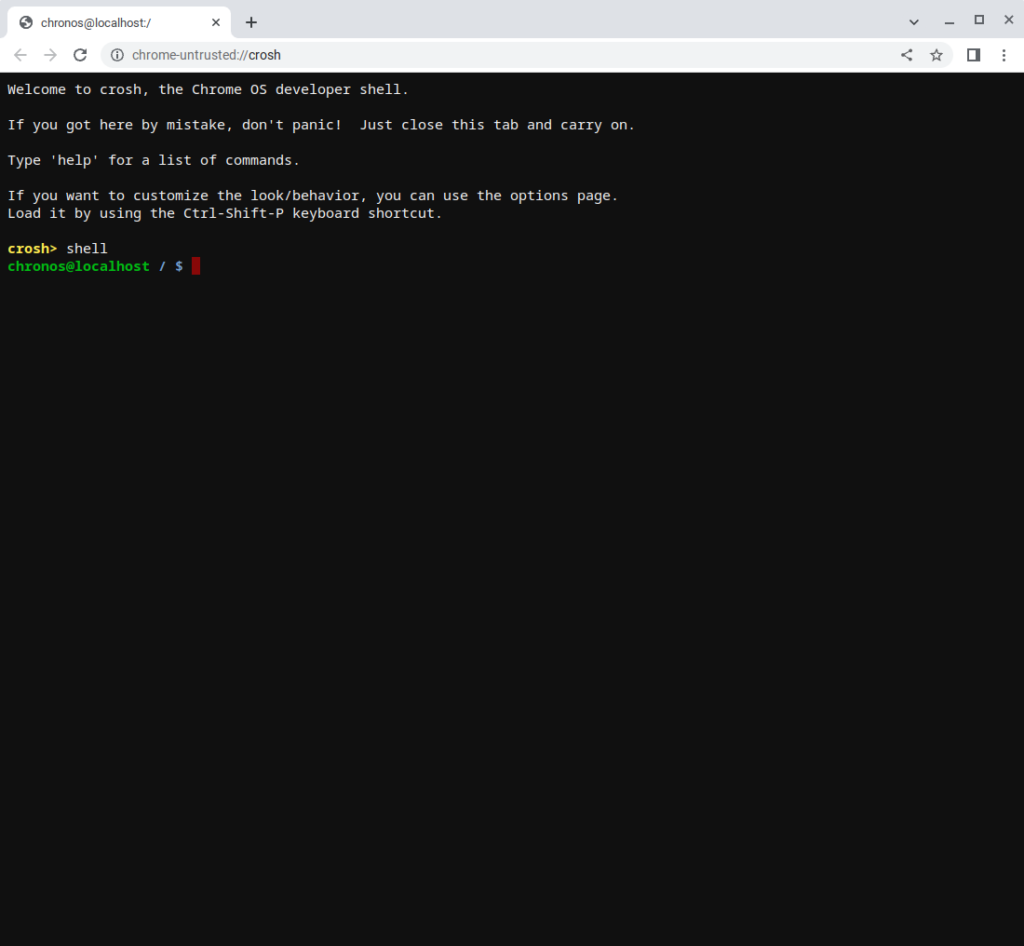
Step 1: Access the Shell
- Boot your Chromium OS on a Raspberry Pi with a different display setup to view the UI.
- Press
ctrl+alt+tto open thecrosh. - Type
shellto enter the shell.
Step 2: Modify the Configuration
-
Use the following command to access the config file:
Terminal window sudo edit-pi-config -
Scroll down to find
dtoverlayand modify it as follows:Terminal window dtoverlay=vc4-fkms-v3d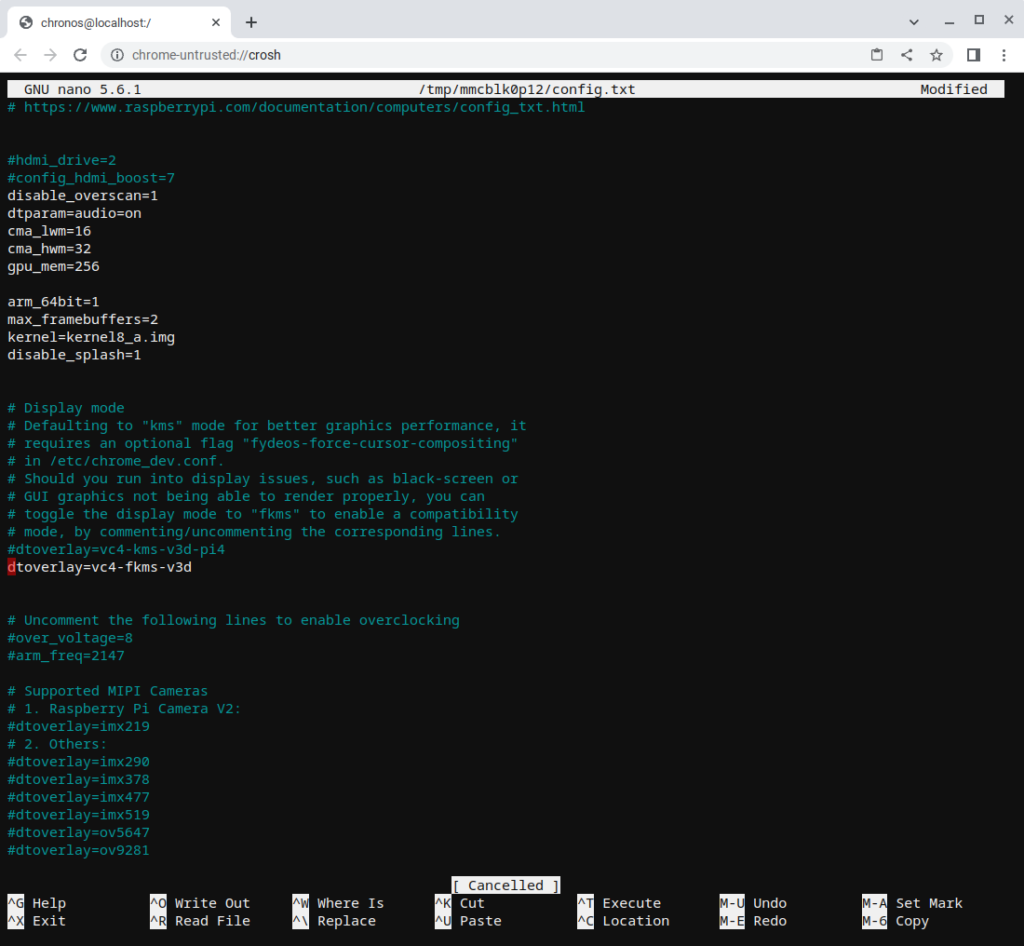
-
Press
ctrl+xand typeyto save the changes.
Step 3: Reboot the System
Enter the following command to reboot your system:
rebootMethod 2: Image Modification
This method involves modifying the image directly on a Linux machine by mounting its partition 12 and altering the configuration.
Step 1: Extract the Firmware
-
Replace the
<version_string>section with your firmware name. -
Use the following command to extract the firmware:
Terminal window xz -d chromiumos_image_<version_string>.img.xz
Step 2: Map the Image Partition
Execute the following command to map the image partition:
sudo kpartx -a chromiumos_image_<version_string>.imgStep 3: Verify the Loop Partition
-
Use the following command to display the image partition:
Terminal window sudo kpartx -l chromiumos_image_<version_string>.img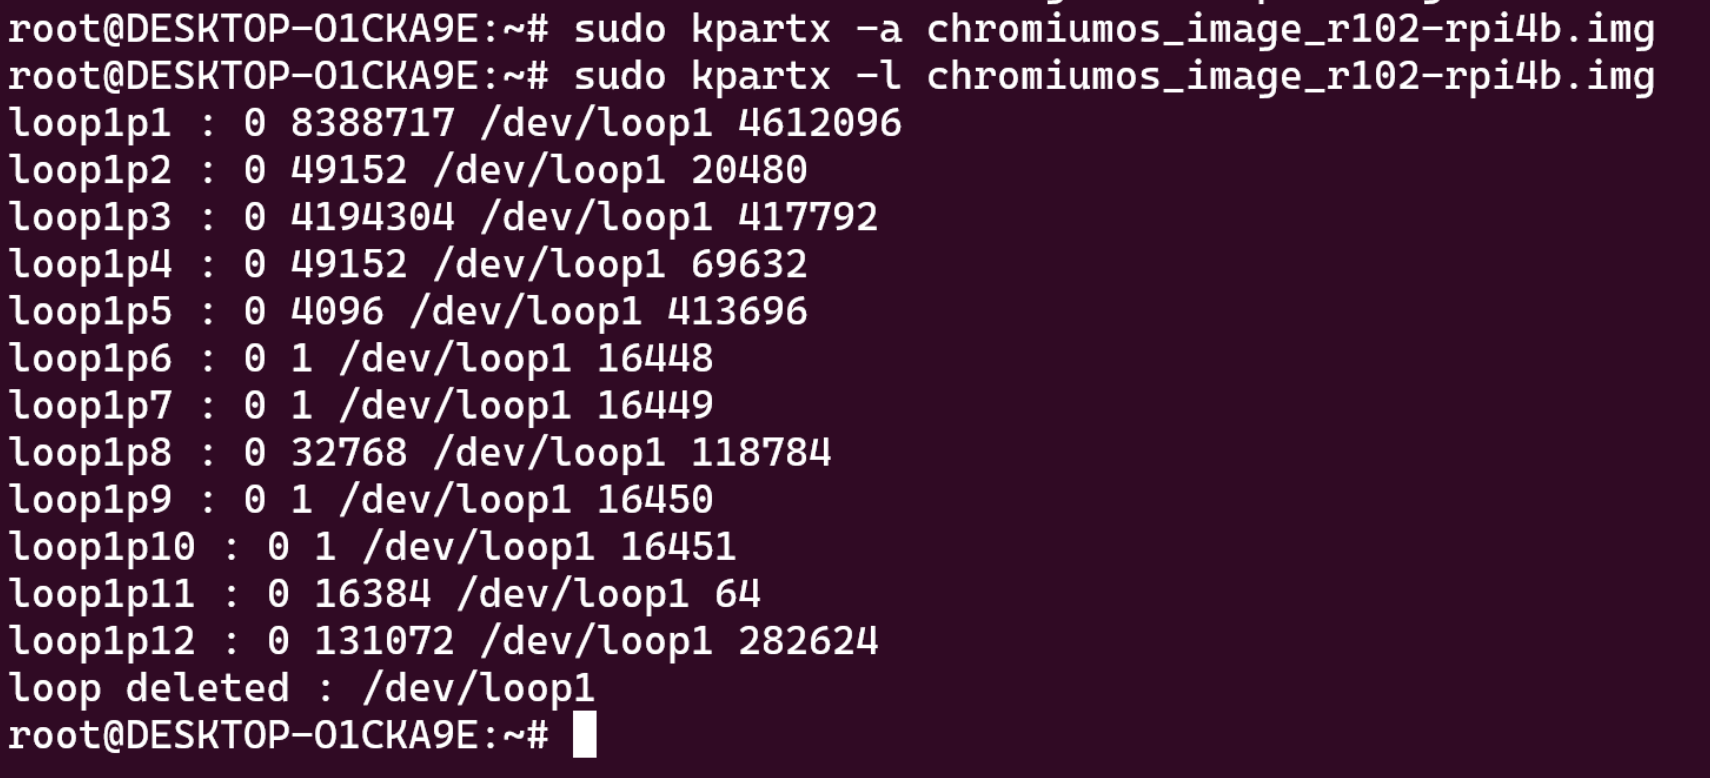
-
Use the following commands to confirm your loop partition:
Terminal window cd /dev/mapper/ls
Step 4: Mount the Partition
Use the following commands to mount loop0p12 as crosp12:
sudo mkdir /mnt/crosp12sudo mount -t msdos /dev/mapper/loop0p12 -o rw /mnt/crosp12Step 5: Modify the Configuration
-
Use the following command to access the file:
Terminal window sudo nano /mnt/crosp12/config.txt -
Scroll down to find
dtoverlayand modify it as follows:Terminal window dtoverlay=vc4-fkms-v3d
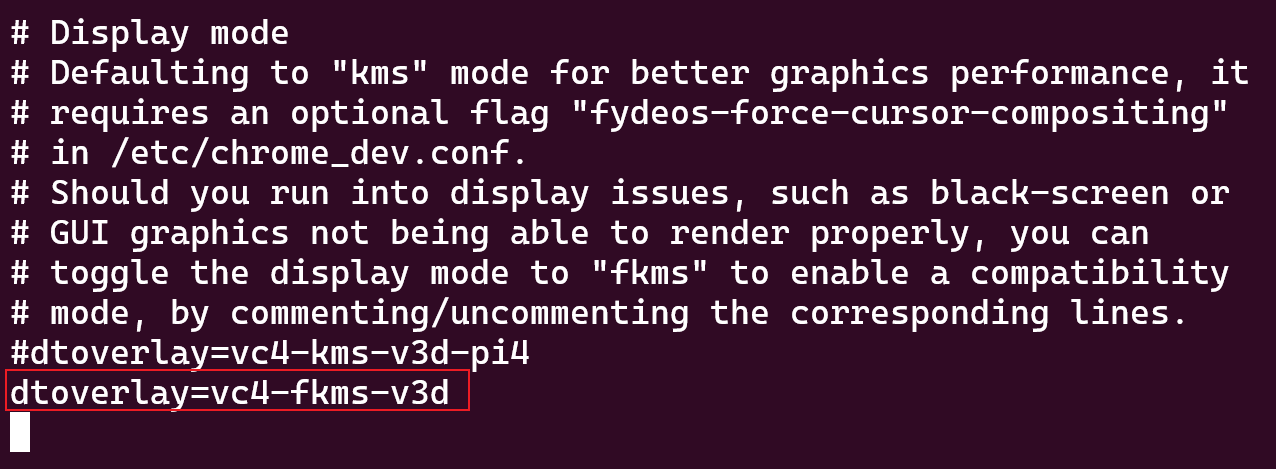
- Press
ctrl+xand typeyto save the changes.
Step 6: Remove the Partition Map
Use the following command to delete the partition map:
sudo kpartx -d chromiumos_image_<version_string>.imgBy following these steps, you can successfully enable fake-kms on your Raspberry Pi device. Choose the method that best suits your technical proficiency and comfort level.