
There was a time when the Chrome operating system (OS) was solely available for Chromebook users, but now it can be used on a variety of devices. Burning the OS image file on a USB drive, and you’re good to go. Here, you will find a detailed guide on how to get “Chrome OS” running on a non-Chromebook.
A few things before installing
Chrome OS is created specifically for Chromebooks, which are lightweight, secure, and fast. Every update is made by Google. It’s one of the easiest computer systems in the world to use. Chromium OS, an open-source project, is powering it behind the scenes. It’s able to run on a wide range of platforms and may be used on any type of device. The majority of PCs will be able to run Chromium OS without issue.
We used the open-source project to build our Chromium OS distro, FydeOS, along with additional features and mainstream hardware support. It’s truly an operating system that doesn’t require too much power and/or specs, and it works just fine.
In this article, I assume that you are not new to system installation and have a basic familiarity with computer operations. If you find the following tutorials difficult to understand, please don’t hesitate to contact us for help.
If you are looking to use FydeOS as a second system for your computer, please refer here.
Installing FydeOS on your device
Before proceeding with the actual installation, you need to download the latest version of FydeOS for PC, and we recommend using Etcher to interact with the system image. The software is well designed, and UI is very friendly; I believe you will quickly become acquainted with it:
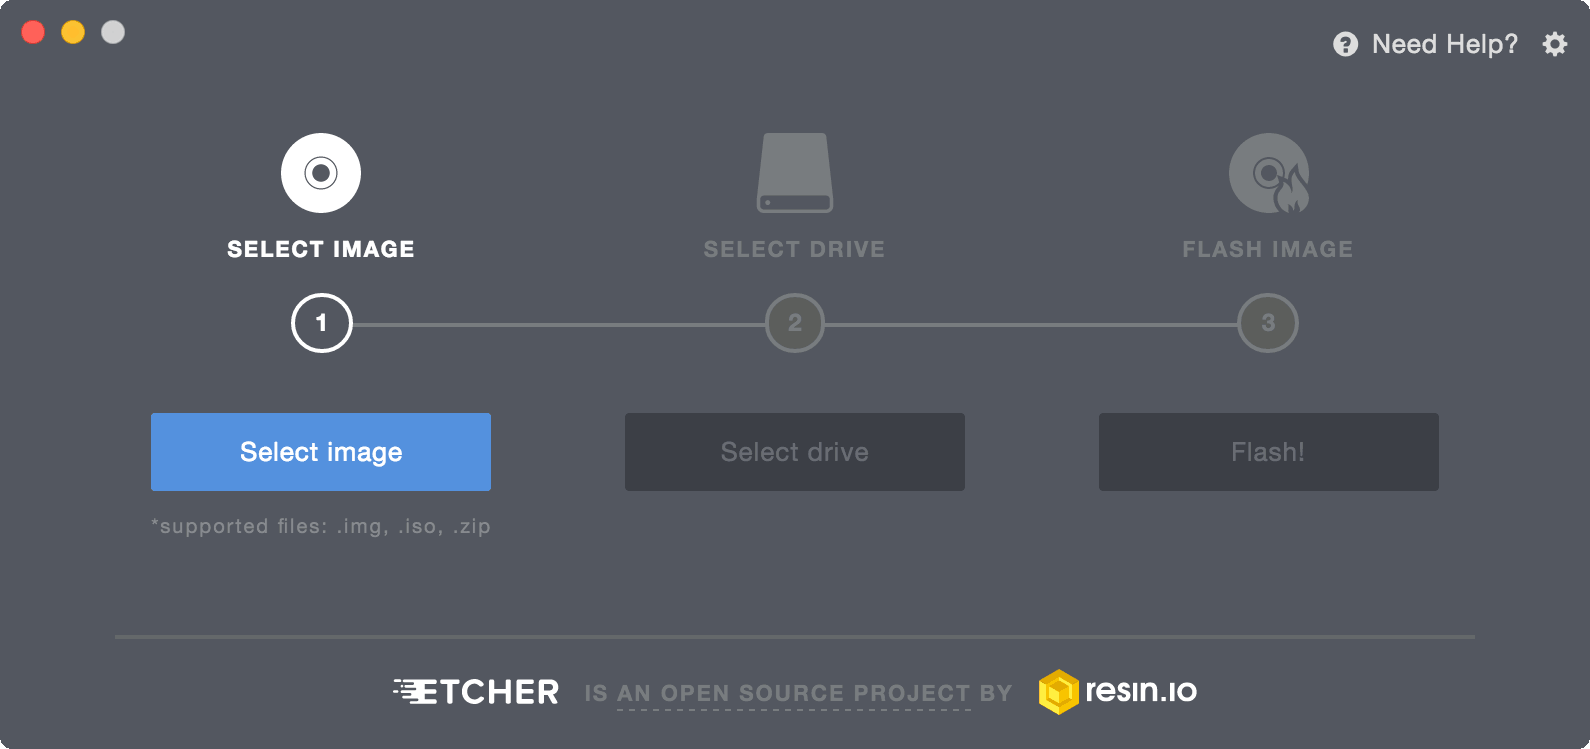
You can download the etcher software from here: Link
You also need to prepare a USB drive above 8G, but make sure it’s empty, so back up everything first before you move on to the next step:
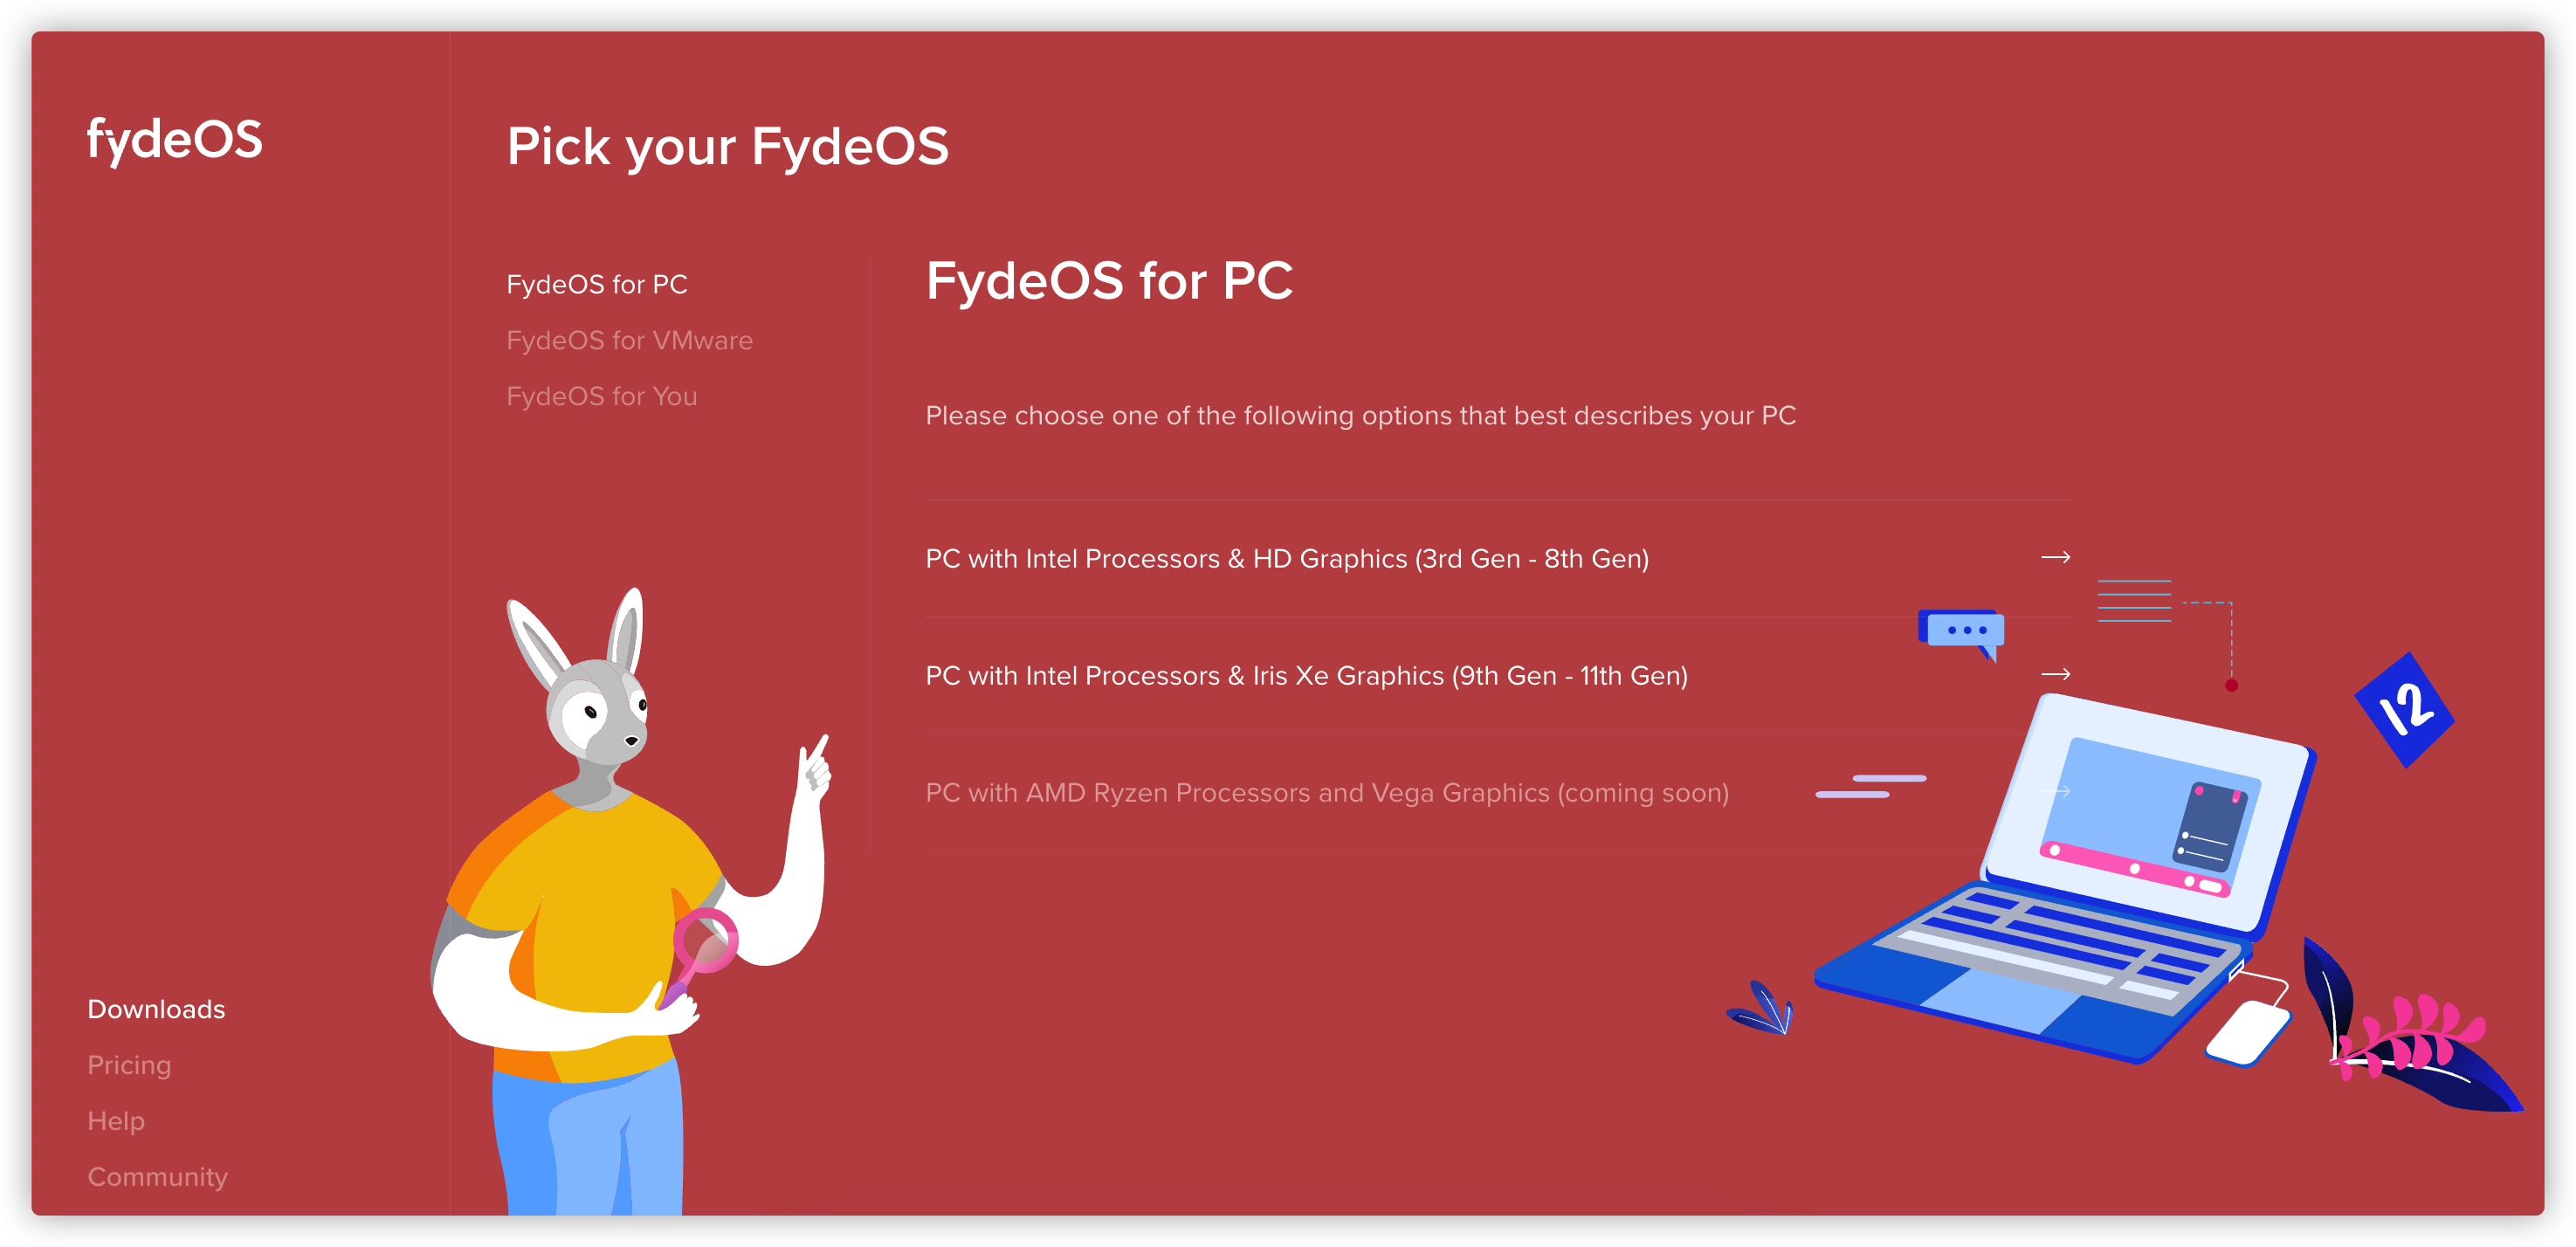
1. Download the FydeOS for PC
Please visit the download page to obtain the image file for the matching version of FydeOS for PC. Kindly note that only Intel chips-based devices are currently supported.
2. Create the bootable drive
When the download is finished, you will see an .xz file. There is no need to unzip or rename it. All you need to do:
- Open etcher.
- Simply choose the image file you just downloaded.
- Select the USB device that you prepare.
- Finally, hit the “Flash!” button, and let etcher deal with the rest.
- The creation process usually takes a few minutes to finish. (depending on your port speed) Wait until etcher check everything works as expected after everything is done.
3. Restart your computer from the bootable
Insert the USB drive into your PC, restart the computer, and configure your PC to boot through the external medium to enjoy the new browsing experience brought by FydeOS.
You need to run BIOS to set USB as your primary boot device.
- You can enter the BIOS by pressing “F8”, “F10”, “F12”, or “Del” when your computer starts up. The key you need to press will vary based on your BIOS.
- BIOS’s UI may vary depending on your computer, but you can look for keywords such as “Boot”.
- After configuring your boot order, click “save & restart”, the actual name may differ in your system.
4. Boot into FydeOS via USB
FydeOS is fantastic as you don’t have to install it and it doesn’t take up any space on your hard drive. You can boot it directly off the USB without installing it, thus your primary operating system will be untouched. You can set up your FydeOS with a Google or local account and use it just for web browsing!
5. Install FydeOS on your device
If you’ve thoroughly tried everything and are satisfied with the results, it’s time to install it.
Install FydeOS For PC to Any Device
That is, try it out on your PC now that you have FydeOS running. You’ll be amazed at how effective it is!